Monday, December 17, 2012

Pine cone Firestarters

I found these online last year and had to do them! 
The original calls for oils to scent, but I can't find oils by me so I used scented wax melts. 

Joann's had the wax for $8
Walmart had the scented wax for $2
Pinecones came from the local park
Hemp rope was used for the wick and I got it for jewelry making

I grabbed a large can from my recycling bin (it was for clams for clam chowder). I wanted something that was deep enough to dip pine cones in, and not too wide that the wax would be too shallow. Peel off the label, remove the top and wash it well.

I just filled a medium sized pot about half-way with water and dropped the can filled with wax and scented wax in there.. Going too high in the temperature makes the water boil and will bounce the can around in the pot causing splashing and injury.

While the wax is melting, take the string of your choice and wrap it starting at the bottom of the pine cone  Leave a tail in the top and tie it off at the top of the pine cone  You don't want it unwrapping covered in hot wax. I used a crochet hook to tie it off so I didn't poke myself. 


One pound of candle wax made me 12 pine cones  but can make many more if your pine cones are small enough and you have the patience. 

I dipped 6 and shook out any excess and placed them on a piece of wax paper. Then I tossed them in an empty space in my fridge and dipped the other 6. I rotated them in and out of the wax and fridge for 3 layers of wax. On the last layer, I dipped the top with the wick first and then flipped it over to do the last layer on the bottom of the pine cones. 


This took me about 1 1/2 hours to make from start to finish They smell good, made the house smell good, and are a cheap, thoughtful, functional gift this holiday :) I tossed them in brown paper lunch sacks that I wrote on with Sharpie and they are good to go to my dad and step dad. They are going to love them! 

Monday, October 1, 2012

Mommy and Me dresses

I made these from tanktops from any store and some fabric. They take about 45 minutes once you figure out what you are doing!


I measured from where I wanted the skirt to start on the shirt around my body, and then down to the length I wanted. I added 1" to all measurements for a seam allowance.


For me, I was 35" around my hips, and 15" from my hips to the top of my knees.


15"+1" (Seam allowance)=16"  then divide by 2 for 2 tiers, or 3 for 3 tiers, it's up to you how many you want.


For the first tier, I multiplied 35x1.5 for the length of the fabric to cut (52.5), and it was 8" wide (see equation above).


For the 2nd tier I multiplied the length of the first tier by 1.5 again. So, 52.5x1.5=78.75" long and 8" wide.


Hem the 2nd tier, and gather it until it is the same length as the first tier.

Sew them together right sides to right sides. 
Fold it "hamburger style" and sew the piece into a circle. (right sides to right sides)
While inside out, insert the tank top in the center of the skirk. The sleeves should be out the bottom of the skirt. Imagine a breeze comes and blows your dress up around your ears... That's what it should look like on the table. 
Stretch the tank until the skirt is tight and pin while stretching. 
Sew the pieces together while stretching the tank and skirt tight.Re enforce this stitch with a second stitch.
Trim extra tank top, or extra fabric from seams.
pick it up by the sleeves and twirl in it!

Here we are looking all cute in them :)


Sunday, September 16, 2012

How to make a teepee

I made these teepees for the kids for Christmas last year.
Aren't they neat? They stand about 5' tall and take up about 5' of the floor. 

I used this pattern for the fabric covering the poles: http://obsessivelystitching.blogspot.com/2010/02/tent-week-day-four-twin-sheet-teepee.html


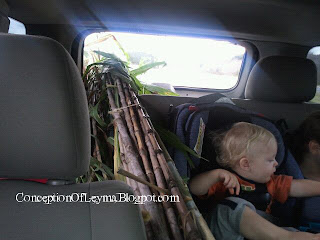
Then I talked to my friends and found some bamboo on the outskirts of my town. My friend and I took a ride out there to pick it up and we walked around the property, there was TONS of bamboo out there! 


brought it all home and dried it out on some saw horses, and cleaned them up. I cut the bamboo all down to the same size (60") and sanded them by hand with sand paper sheets. That was quite the arm work out! I definitely recommend it lol. Then I wiped them down with a damp rag and put on a layer of lacquer. After a few days of drying and a reapplication of the lacquer, they were ready to go! 


My kids love them! They play in them for hours at a time out in the playroom.


Friday, September 14, 2012

Deals!!

I was wandering around online and found a few deals on crafting supplies!

$6.95 for a box of beautiful thread!

 http://pickyourplum.com/


Thursday, September 13, 2012

First Post

Well, there has to be a first post I suppose! 

Today I decided I was going to start a blog and keep track of the store I opened and the craft show I am stocking for. I stocked my store with some of the things I have on hand, and I am hoping to get some more things done and stocked in there. Check it out Here :) 

I am a long time member of Cafemom and I love it there! You can talk to me there as MissElissa21. I can normally be found in the Craft Cafe group! How fitting since I feel like I am always crafting.


I talked to my Best Friend today about an adventure with a craft fair here in my small town and I think she is open to discussing it more. I attend it every year as a shopper, but I am really hoping to attend it this year as a vender. So far I think I have a good idea of what I want to sell there which is everything I hope to have stocked in my store. I'll let you know when I get that list compiled!